Step-by-Step cPanel to cPanel Website Migration Guide: The Ultimate Masterclass for 2026
When operating or expanding a digital platform targeted at high-traffic regional markets like Texas, New York, California, Washington, and San Francisco, optimizing server performance is a non-negotiable priority. For millions of website owners, agencies, and developers, cPanel stands as the industry-standard control panel. Because cPanel is utilized by hundreds of global hosting providers, moving your website from an old budget host to a faster, more reliable infrastructure often boils down to a cPanel-to-cPanel migration.
When executed correctly, a cPanel-to-cPanel transfer is the cleanest, most comprehensive migration method available because it packages your entire hosting account—including web files, databases, SSL certificates, email accounts, forwarders, and DNS zone configurations—into a single, unified archive.
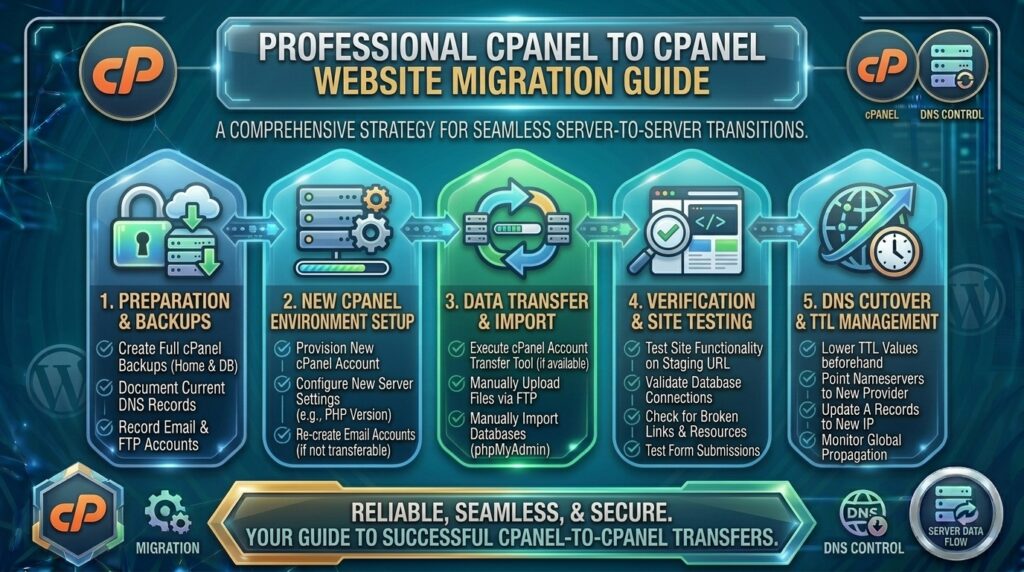
This comprehensive, expert-level guide walks you through the exact step-by-step process to perform a seamless cPanel-to-cPanel migration with zero downtime, maximum data integrity, and optimal technical SEO results.
Why cPanel-to-cPanel Migration is the Gold Standard
Before diving into the technical workflow, it helps to understand why transferring between two cPanel-powered hosts is vastly superior to manual file-and-database copying:
- Complete System Portability: Unlike WordPress-specific migration plugins that only package your CMS content, a full cPanel backup transfers everything on your account, including subdomains, addon domains, custom email accounts, FTP users, and raw configuration files.
- Preserved Database Serialization: Moving serialized database tables manually often leads to broken links or corrupted theme options. cPanel’s native backup and restore architecture handles database mapping automatically.
- Minimized Human Error: Because both servers run identical directory structures and architecture profiles, the risk of file permission mismatches or missing server extensions is minimized.
Phase 1: Pre-Migration Planning and Auditing
Failing to plan is planning to fail. Before touching any administrative settings, execute this mandatory pre-migration checklist to guarantee a smooth transition.
1. Audit Your Existing Account Storage and Inodes
Log into your current cPanel dashboard, locate the Statistics sidebar on the right, and check your total disk usage and inode count (total number of files). If your account is bloated with gigabytes of unoptimized log files, temporary caches, or old backups, clean them up before generating your migration archive.
2. Lower Your Domain DNS TTL (Time to Live)
To ensure a zero-downtime transition when you eventually point your domain to the new server, log into your DNS registrar or DNS management console (e.g., Cloudflare or Namecheap) and lower the TTL on your domain’s A Records to 300 seconds (5 minutes) at least 24 hours prior to migrating.
3. Freeze Content Updates
To prevent database synchronization conflicts (where a user posts a comment or places an e-commerce order on the old server while you are copying files), put your website into maintenance mode temporarily.
Phase 2: Generating a Full Backup on the Old cPanel Host
The first active step of the migration begins on your legacy hosting account. You need to create a complete, uncompressed or compressed system backup package.
Step-by-Step Instructions:
- Log into your Old Host’s cPanel account.
- Navigate to the Files section and click on the Backup Wizard (or the modern Backup tool).
- Click on Download a Full Account Backup (or Generate a Full Backup).
- For the destination, select Home Directory (or a remote destination like SFTP if your old host’s disk space is tight).
- Enter your personal email address so you receive an automated notification email the moment the backup archive generation is complete.
- Click Generate Backup.
Important Note: Depending on the size of your website, generating a full backup can take anywhere from a few minutes to over an hour. Do not close your browser tab until the progress indicator finishes or you receive the confirmation email.
Phase 3: Moving the Backup Archive to the New Host
Once your backup archive (formatted typically as backup-MM-DD-YYYY_username.tar.gz) has been successfully generated in the home directory of your old server, you need to transfer it to your new host.
You have three primary methods to accomplish this:
Method 1: The Direct Server-to-Server Transfer (Fastest for Large Files)
If you have access to SSH or if your new host’s support team can assist, you can use scp or rsync to pull the file directly from the old server to the new server, bypassing your local computer’s internet upload limits.
Method 2: Download and Re-Upload (Easiest for Smaller Sites)
- In your old cPanel, navigate to the File Manager, locate your newly generated
.tar.gzbackup file sitting directly in your root home directory (outside ofpublic_html), and download it to your local computer. - Log into your New Host’s cPanel, open its File Manager, and upload that exact
.tar.gzarchive directly into your new server’s root home directory.
Phase 4: Restoring the Full Backup on the New cPanel Host
With your backup archive sitting safely inside your new hosting account’s home directory, you are ready to restore it.
Step-by-Step Instructions:
- Log into your New Host’s cPanel account.
- Navigate to the Files or Backup section and click on Backup Wizard (or Backup).
- Click on Restore.
- Select Restore a Full Backup / User Directory Backup.
- Choose your upload source (Home Directory if you uploaded it there via File Manager).
- Select the uploaded backup file name from the dropdown menu and click Upload / Restore.
cPanel will now unpack your entire archive, automatically recreating your databases, restoring all mailboxes, resetting file permissions, and re-establishing your .htaccess rules.
Phase 5: Testing Your Migration Locally Before Changing DNS
Never update your public DNS records blindly. You must verify that your migrated website functions correctly on the new server before the rest of the world sees it.
How to Bypass DNS Locally Using Your Computer’s Hosts File:
- Find your New Hosting Server’s Public IP Address in your new welcome email or cPanel sidebar.
- Open your computer’s local hosts file:
- Windows:
C:\Windows\System32\drivers\etc\hosts(open Notepad as Administrator). - Mac / Linux:
/etc/hosts(edit via Terminal usingsudo nano /etc/hosts).
- Windows:
- Add a line at the bottom in this format:Plaintext
NEW_SERVER_IP_ADDRESS yourdomain.com www.yourdomain.com - Save the file, open your browser, and navigate to
yourdomain.com. Your browser will now load your site directly from the new cPanel server. - Thoroughly test your admin dashboard, permalinks, forms, SSL certificate status, and database connections. Once confirmed, delete that line from your hosts file.
Phase 6: Updating DNS Records and Managing Propagation
Once your local testing confirms that everything is operating at peak performance, it is time to direct public traffic to your new home.
Step-by-Step Instructions:
- Log into your DNS registrar or external DNS manager (e.g., Cloudflare).
- Update the main A Records (
@andwww) to point from your old server IP address to your new cPanel server IP address. - If your email is hosted on your cPanel server (rather than an external provider like Google Workspace), ensure your MX Records are also updated to point to your new server hostname.
- Allow global DNS propagation to take place. Because you lowered your TTL to 5 minutes prior to migrating, propagation typically completes globally within 15 to 60 minutes.
Phase 7: Post-Migration Verification and Final Cleanup
Once propagation has finished, perform these final checks:
- Verify SSL/TLS Certificates: Ensure AutoSSL has successfully secured your domains with active HTTPS certificates on the new server.
- Monitor Error Logs: Check your new cPanel Errors metric tool to ensure no broken paths or PHP warnings are occurring.
- Keep Old Host Active (72-Hour Rule): Do not cancel your old hosting account immediately. Leave it active for at least 72 hours to ensure that all global ISPs have fully updated their DNS caches.
- Terminate Old Hosting: Once you are 100% confident that traffic, email delivery, and database operations are stable on the new server, safely log into your old provider and cancel your subscription.
Frequently Asked Questions (FAQ)
1. What is a cPanel-to-cPanel website migration?
It is a comprehensive server transfer method that uses cPanel’s native backup and restore architecture to move your entire web hosting account—files, databases, emails, and configurations—from one host to another.
2. Can I perform a cPanel migration without any downtime?
Yes. By keeping your old hosting account active while restoring the full backup on the new server, testing via a local hosts file override, and managing your DNS TTL strategically, you achieve a seamless transition.
3. Do I need technical coding skills to do a cPanel migration?
No. cPanel’s built-in Backup Wizard and Restore tools automate the entire packaging and unpacking process, making it accessible even for beginners.
4. What happens to my professional email accounts during a cPanel migration?
A full cPanel backup automatically packages all your email accounts, passwords, forwarders, and mail folders. When you restore the backup on the new server, your emails are restored along with your website files.
5. Why does my restored website show a database connection error?
This usually occurs if the database username or password changed during restoration, or if the wp-config.php file credentials do not match the newly restored database parameters. You can easily fix this via cPanel’s MySQL databases tool.
6. How long does a full cPanel account backup take to generate?
Generation time depends entirely on your site’s total disk size and file count. Small sites take 2 to 5 minutes, while massive media-heavy sites can take over an hour.
7. What is DNS propagation and how long does it take?
DNS propagation is the time it takes for global internet service providers to recognize your new server IP address. By lowering your TTL to 5 minutes before migrating, propagation usually finishes within 15 to 60 minutes.
8. Can I migrate only one addon domain instead of the whole cPanel account?
Yes. While a full backup transfers the entire account, you can also use manual file backups and database exports if you only want to migrate a single addon domain to a new cPanel environment.
9. Will my Google SEO rankings drop after a cPanel migration?
If executed with zero downtime, proper URL retention, and active SSL certificates, your search engine rankings will remain completely unaffected and stable.
10. Which web hosting providers offer the easiest cPanel migration support?
Many reputable budget hosts (such as Namecheap and select cPanel-based partners) offer free professional migration assistance, where their technical support team handles the entire cPanel-to-cPanel transfer for you upon request.
Conclusion
Mastering the step-by-step cPanel to cPanel website migration process gives you total freedom to upgrade your hosting infrastructure whenever performance demands it. By following this comprehensive blueprint—auditing your storage, generating full system archives, testing locally via hosts file overrides, and managing your DNS TTL strategically—you can transition your digital assets with absolute confidence.
Whether you are scaling an e-commerce platform in New York, a tech blog in San Francisco, or a local business site in Texas, a clean cPanel migration protects your data integrity, preserves your email infrastructure, and ensures uninterrupted visibility in Google search results.