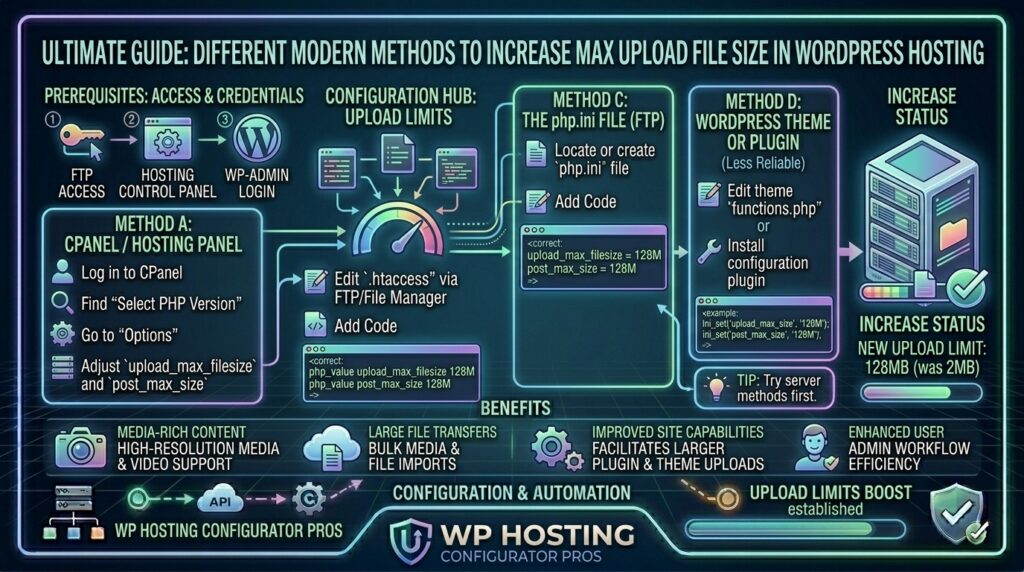
How to Increase the Maximum Upload File Size in WordPress Hosting: The Complete Engineering Guide
Welcome to thehostreviews.com—your premier authoritative destination for WordPress optimization, server administration guides, and high-performance hosting troubleshooting spanning major tech hubs from New York and San Francisco to Texas, California, and Washington.
Introduction: The Frustrating Upload Limit Wall
Every WordPress administrator has experienced this scenario: you attempt to upload a newly purchased premium theme, a robust enterprise plugin zip file, or a high-resolution video portfolio to your media library, and suddenly, WordPress halts your progress with a cryptic error message:
“The uploaded file exceeds the upload_max_filesize directive in php.ini.”
Or perhaps you encounter a generic “Post maximum size exceeded” or “HTTP Error” notification.
By default, most standard web hosting providers and default PHP installations configure conservative limits for file uploads—typically restricting uploads to 2MB or 10MB. While this low threshold protects shared server environments from resource exhaustion, it is entirely inadequate for modern WordPress sites running rich media, page builders, and complex plugin ecosystems.
Because WordPress relies on the underlying PHP programming environment and web server configuration, increasing your upload limit requires adjusting settings across specific server files or your control panel.
This comprehensive, expert-level guide will walk you through every proven method to safely increase your maximum upload file size, optimize your WordPress hosting environment, and prevent timeout errors.
Part 1: Understanding Why WordPress Upload Limits Exist
Before diving into configuration solutions, it is essential to understand the hierarchy of restrictions governing file uploads in WordPress.
The upload limit is not set by WordPress itself; rather, WordPress inherits its limitations from PHP and your web server software (Nginx or Apache). When you upload a file, it passes through multiple security and resource gates:
- PHP
upload_max_filesize: Dictates the absolute maximum file size allowed for an individual uploaded file. - PHP
post_max_size: Dictates the maximum amount of data that can be sent via an HTTP POST request. Note: This value must always be larger than yourupload_max_filesize, because a POST request can contain form data alongside the file. - PHP
max_execution_time: Determines how many seconds a script is allowed to run before being terminated by the server. Large uploads take time; if this limit is too low, uploads will timeout. - Web Server Limits (
client_max_body_sizein Nginx /LimitRequestBodyin Apache): Web servers maintain their own internal gatekeepers. Even if PHP allows 64MB uploads, Nginx will block any request exceeding its default 1MB or 2MB body size limit.
Part 2: 7 Proven Methods to Increase WordPress Upload Size
Depending on whether you are using shared hosting with cPanel, an unmanaged VPS with root access, or a managed cloud container, one of the following methods will successfully raise your limits.
Method 1: Editing the php.ini File (For VPS and Root-Level Access)
If you have an unmanaged Linux VPS, a dedicated server, or access to your server’s root directory, modifying the active php.ini configuration file is the most direct and reliable solution.
- Connect to your server via SSH:Bash
ssh root@your_server_ip - Locate your active
php.inifile. Its path depends on your PHP version (e.g., PHP 8.2 or 8.3):Bashnano /etc/php/8.2/fpm/php.ini # For Nginx/PHP-FPM # OR nano /etc/php/8.2/apache2/php.ini # For Apache - Search for and modify the following directives to your desired values (e.g., 256MB):Ini, TOML
upload_max_filesize = 256M post_max_size = 256M max_execution_time = 300 memory_limit = 512M - Save the file and restart your web server or PHP-FPM service:Bash
systemctl restart php8.2-fpm systemctl restart nginx
Method 2: Modifying the .htaccess File (For Apache Servers)
If your hosting environment runs Apache and permits .htaccess overrides, you can increase your limits directly within your website’s root directory.
- Connect to your server via FTP/SFTP or use your hosting File Manager.
- Locate the
.htaccessfile in the root directory of your WordPress installation (ensure hidden files are visible). - Open the file and append the following lines at the very bottom:Apache
php_value upload_max_filesize 256M php_value post_max_size 256M php_value memory_limit 512M php_value max_execution_time 300 php_value max_input_time 300 - Save the file and refresh your WordPress Media Library upload page. (Note: If your site crashes or displays a 500 Internal Server Error after saving, your host likely runs PHP as a CGI/FastCGI application which does not support
.htaccessPHP directives. Simply delete the lines to restore functionality).
Method 3: Using the wp-config.php File
You can attempt to override PHP memory and upload constraints directly inside WordPress’s core configuration file.
- Access your server files via FTP or File Manager.
- Open the
wp-config.phpfile located in your WordPress root directory. - Paste the following lines right above the line that says
/* That's all, stop editing! Happy publishing. */:PHP@ini_set( 'upload_max_filesize', '256M' ); @ini_set( 'post_max_size', '256M' ); @ini_set( 'memory_limit', '512M' ); @ini_set( 'max_execution_time', '300' ); @ini_set( 'max_input_time', '300' ); - Save the file and test your upload limits.
Method 4: Configuring Nginx Web Server Limits (nginx.conf)
If you run Nginx as a standalone web server or as a reverse proxy in front of Apache (as detailed in our high-performance architecture guides), Nginx will block large uploads before they even reach PHP unless you adjust the client_max_body_size directive.
- Open your Nginx global configuration file or your specific site’s virtual host block:Bash
nano /etc/nginx/nginx.conf # OR nano /etc/nginx/sites-available/thehostreviews.conf - Inside the
http,server, orlocationblock, add or modify the body size directive:Nginxhttp { client_max_body_size 256M; } - Test your configuration for syntax errors and reload Nginx:Bash
nginx -t systemctl reload nginx
Method 5: Using cPanel MultiPHP INI Editor (For Managed Shared Hosting)
If your web host uses cPanel (common among traditional shared and managed VPS providers), you can update your PHP limits visually without touching code.
- Log into your cPanel dashboard provided by your host.
- Scroll down to the Software section and click on MultiPHP INI Editor.
- Select your domain name from the dropdown menu.
- Locate the configuration directives (
upload_max_filesize,post_max_size,max_execution_time,memory_limit) and change their values using the input boxes. - Click Apply or Save.
Method 6: Creating or Modifying a user.ini or php.ini in WordPress Root
Many modern hosting providers running PHP-FPM ignore .htaccess PHP directives. Instead, they look for a local php.ini or .user.ini file in the directory where your WordPress site resides.
- Using your file manager or FTP client, create a new file named
.user.iniin your WordPress root folder (/public_html/.user.ini). - Add the following configuration lines:Ini, TOML
upload_max_filesize = 256M post_max_size = 256M memory_limit = 512M max_execution_time = 300 - Save the file. PHP-FPM will automatically recognize these directives within a few minutes.
Method 7: Contacting Your Web Hosting Support Provider
If you have exhausted all configuration options and your upload limit remains unchanged, your hosting provider may have locked these parameters at the server kernel or master container level (common on restrictive cheap shared hosting tiers).
Reach out to your host’s support team via live chat or ticket and request:
“Could you please increase the
upload_max_filesize,post_max_size, andmax_execution_timelimits for my hosting account to 256MB?”
Reputable hosts will update these values for you in minutes.
Part 3: Verifying Your New Upload Limits
Once you have applied one or more of the methods above, verify that WordPress has successfully registered the changes:
- Log into your WordPress Admin Dashboard (
/wp-admin). - Navigate to Tools > Site Health.
- Click on the Info tab and expand the Server section.
- Look for PHP max upload size, Post max size, and PHP memory limit. Ensure they reflect your newly configured values (e.g., 256 MB).
- Alternatively, navigate to Media > Add New and verify that the small text underneath the upload dropzone now displays your new limit (e.g., “Maximum upload file size: 256 MB”).
Part 4: Best Practices for Handling Large Media Files
While increasing your upload limit allows you to install large plugins and themes, uploading massive media files directly to WordPress can impact performance. Follow these best practices:
- Optimize Images Before Uploading: Use compression tools or WebP converters to reduce image file sizes before uploading them to your media library, preserving server storage and speeding up page load times.
- Use SFTP for Heavy Files: If you need to upload massive files (such as database backups, zip archives, or video streams exceeding 500MB), uploading via SFTP or command-line
scpis significantly faster and more reliable than the WordPress browser uploader. - Increase Execution Times for Large Imports: If you are migrating a massive site using plugins like All-in-One WP Migration, ensure your
max_execution_timeis set to at least 600 seconds to prevent timeout crashes during import.
Part 5: Frequently Asked Questions (FAQ)
1. What is the default maximum upload file size in WordPress?
By default, most hosting providers set the maximum upload file size between 2MB and 10MB to conserve server memory and prevent resource abuse on shared hosting environments.
2. Why does changing php.ini not work on my website?
If modifying php.ini has no effect, your server may be running PHP as CGI/FastCGI (requiring a .user.ini file instead) or your hosting provider has locked those settings at the master server level.
3. What is the difference between upload_max_filesize and post_max_size?
upload_max_filesize controls the size limit for a single individual file, whereas post_max_size controls the total aggregate data allowed in an entire HTTP POST request. post_max_size must always be equal to or greater than upload_max_filesize.
4. Will increasing the upload limit slow down my WordPress site?
No. Increasing your upload limits simply tells the server how large of a file it is allowed to process when requested. It does not consume extra RAM or slow down your site during normal browsing.
5. Why do I get a “500 Internal Server Error” after editing .htaccess?
A 500 error occurs when Apache encounters a syntax error or a directive it does not support (such as php_value on servers running PHP-FPM). Delete the added lines from your .htaccess file to instantly restore your site.
6. Can Nginx block file uploads even if PHP is configured correctly?
Yes! Nginx has an internal safety directive called client_max_body_size (defaulting to 1MB). If this is not increased in your Nginx configuration, Nginx will reject large uploads before PHP even sees them.
7. How do I check my current upload limit without logging into the server?
You can check your current upload limit instantly inside WordPress by going to Tools > Site Health > Info > Server, or by checking the text at the bottom of the Media > Add New upload screen.
8. What should I do if my upload times out before finishing?
If large uploads time out, you need to increase your PHP max_execution_time and max_input_time directives (e.g., setting them to 300 or 600 seconds) in your configuration file.
9. Can I increase upload limits on free or cheap shared hosting?
Many ultra-cheap shared hosting plans strictly prohibit modifying PHP limits. If your host restricts you, upgrading to a cloud VPS or a managed WordPress host is recommended.
10. Is 256MB a safe upload limit for WordPress?
Yes, 256MB is the industry standard for modern WordPress hosting. It provides ample headroom for heavy theme zip files, premium plugins, and high-resolution media uploads without exposing your server to security risks.
Conclusion
Encountering upload size restrictions in WordPress can be frustrating, but overcoming them is straightforward once you understand how PHP and your web server interact. Whether modifying php.ini, configuring Nginx body sizes, or updating cPanel multi-PHP settings, raising your upload limit empowers you to manage your WordPress site without barriers.
Keep visiting thehostreviews.com for more expert WordPress optimization guides, server administration tutorials, and cloud hosting reviews.