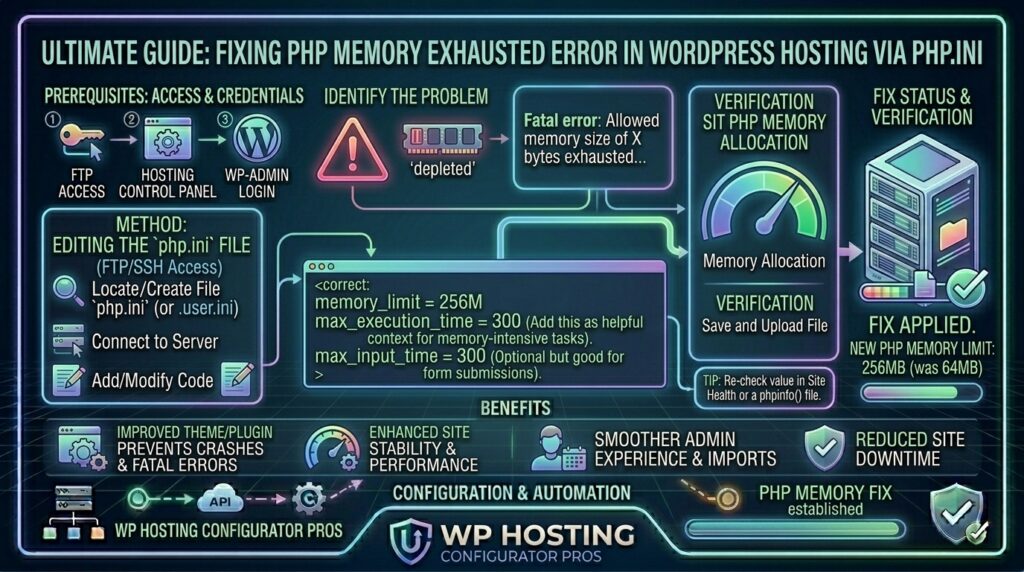
Fixing the “Memory Exhausted Error” in WordPress Hosting via php.ini: The Ultimate Troubleshooting Guide
Welcome to thehostreviews.com—your premier authoritative destination for WordPress performance tuning, server error resolution, and cloud hosting architecture reviews spanning major tech hubs from New York and San Francisco to Texas, California, and Washington.
Introduction: The Dreaded White Screen of PHP Memory Failure
Every WordPress administrator, developer, and digital agency owner dreads encountering the infamous WordPress memory error. You are in the middle of updating a suite of plugins, installing a robust page builder, importing a large e-commerce catalog, or simply navigating your wp-admin dashboard, when suddenly the screen freezes, or worse, replaces your entire site with a stark error message:
“Fatal error: Allowed memory size of 67108864 bytes exhausted (tried to allocate 40960 bytes) in /var/www/html/wp-includes/class-wp-image-editor.php on line 426”
Or perhaps you encounter its modern variant on newer PHP versions:
“Fatal error: Out of memory (allocated 134217728 bytes) (tried to allocate 20480 bytes)…”
This catastrophic interruption is known as the WordPress Memory Exhausted Error. It occurs when your WordPress application, active plugins, or theme execute a script that demands more RAM than the PHP interpreter is currently permitted to consume on your server.
By default, standard shared hosting providers and default PHP installations allocate conservative memory limits—frequently restricting individual scripts to 32MB, 64MB, or 128MB. While sufficient for a bare-bones WordPress installation, this threshold is quickly surpassed by modern plugins, WooCommerce databases, and heavy administrative tasks.
Because this error is fundamentally rooted in server-side resource constraints, the definitive solution requires adjusting your PHP configuration file—the php.ini file.
This comprehensive, expert-level guide will walk you through the anatomy of PHP memory limits, every proven method to increase your memory pool via php.ini, and advanced optimization strategies to ensure your WordPress site never runs out of RAM again.
Part 1: Understanding How PHP Memory Allocation Works in WordPress
Before jumping into configuration edits, it is essential to understand why this error happens and how PHP manages memory behind the scenes.
The Memory Hierarchy:
- PHP
memory_limit: This master directive dictates the maximum amount of memory in bytes (or megabytes, e.g.,256M) that a single PHP script is allowed to consume. If a script requests even one byte past this limit, PHP halts execution immediately and throws a fatal error. - WordPress Default Allocation (
WP_MEMORY_LIMIT): WordPress has its own internal memory cap defined inwp-config.php. Even if your server’s master PHP limit is set to 512MB, WordPress core will restrict itself to a default lower limit (typically 40MB for sites and 256MB for admin panels) unless explicitly overridden. - The Peak Memory Spike: Administrative operations—such as regenerating thumbnails, running WooCommerce database migrations, executing automated backups via UpdraftPlus, or compiling page builder caches—trigger massive memory spikes. If your limit is set too low, these routine tasks will trigger a crash.
Part 2: Step-by-Step Guide — Fixing Memory Exhaustion via php.ini
If you have root access to a Linux VPS or managed cloud server, modifying the active php.ini file is the most robust and permanent way to resolve memory exhaustion errors.
Step 1: Locate Your Active php.ini File
Different versions of PHP (e.g., PHP 8.1, 8.2, 8.3) and different web server architectures store their configuration files in different paths.
- Connect to your server via SSH:Bash
ssh root@your_server_ip - Run the following command to check which
php.inifile your system is actively loading:Bashphp -i | grep "Loaded Configuration File"Typical paths include:- For Nginx with PHP-FPM:
/etc/php/8.2/fpm/php.ini - For Apache with mod_php:
/etc/php/8.2/apache2/php.ini - For AlmaLinux / RedHat:
/etc/php.ini
- For Nginx with PHP-FPM:
Step 2: Edit the memory_limit Directive
- Open your active
php.inifile using a text editor like Nano:Bashnano /etc/php/8.2/fpm/php.ini - Search for the
memory_limitdirective (useCtrl + Win Nano to search). - Increase the value to a safe, modern production standard (e.g., 256M or 512M):Ini, TOML
memory_limit = 512MBonus Recommendation: While you are insidephp.ini, it is also wise to increase your maximum execution time and upload limits to prevent secondary timeout errors:Ini, TOMLupload_max_filesize = 256M post_max_size = 256M max_execution_time = 300 - Save and exit the file (
Ctrl + O,Enter, thenCtrl + X).
Step 3: Restart Your Web Server / PHP-FPM Service
Changes made to php.ini will not take effect until you restart your web server or PHP processor. Run the appropriate command for your stack:
- For Nginx + PHP-FPM:Bash
systemctl restart php8.2-fpm systemctl restart nginx - For Apache:Bash
systemctl restart apache2
Part 3: Alternative Methods to Increase Memory Limits
If you are on shared hosting, cPanel, or do not have direct SSH access to edit the system-wide php.ini file, several alternative methods allow you to increase your memory limit.
Method 1: Modifying the wp-config.php File
WordPress allows you to request a higher memory limit directly inside its core configuration file. This overrides the default WordPress memory cap.
- Connect to your server via FTP/SFTP or use your hosting control panel’s File Manager.
- Open the
wp-config.phpfile located in your WordPress root directory. - Paste the following line right above the line that says
/* That's all, stop editing! Happy publishing. */:PHPdefine( 'WP_MEMORY_LIMIT', '512M' ); - If you also experience crashes inside your WordPress admin dashboard (
/wp-admin), define a separate admin memory limit:PHPdefine( 'WP_MAX_MEMORY_LIMIT', '512M' ); - Save the file and refresh your site. (Note: This method works only if your hosting provider’s master PHP
memory_limitis equal to or greater than the value you define here).
Method 2: Editing the .htaccess File (For Apache Servers)
If your hosting environment runs Apache and permits local configuration overrides, you can declare a higher memory limit inside your .htaccess file.
- Locate the
.htaccessfile in your WordPress root directory. - Open the file and append the following line at the very top:Apache
php_value memory_limit 512M - Save the file. (Warning: If your hosting provider runs PHP as CGI/FastCGI rather than an Apache module, adding
php_valuedirectives to.htaccesswill trigger a 500 Internal Server Error. If this happens, immediately delete the line).
Method 3: Using cPanel MultiPHP INI Editor (For Managed Shared Hosting)
If your web host provides a cPanel dashboard, you can adjust your PHP limits visually without touching code files.
- Log into your cPanel account.
- Navigate to the Software section and click on MultiPHP INI Editor.
- Select your domain name from the dropdown menu.
- Locate the
memory_limitinput box and change its value to512M(or select from the dropdown). - Click Apply or Save.
Method 4: Creating a Local .user.ini or php.ini File
Many modern cloud and shared hosts running PHP-FPM ignore .htaccess modifications. Instead, they read local configuration files placed inside your public website directory.
- Create a new file named
.user.iniin your WordPress root folder (/public_html/.user.ini). - Add the following line:Ini, TOML
memory_limit = 512M - Save the file. PHP-FPM will automatically apply these settings to your specific account within a few moments.
Part 4: How to Verify Your New Memory Limit
After applying one of the configuration methods above, verify that WordPress and PHP have successfully registered your new memory allocation:
- Log into your WordPress Admin Dashboard.
- Navigate to Tools > Site Health.
- Click on the Info tab and expand the Server section.
- Look for PHP memory limit. Ensure it displays your newly configured value (e.g.,
512 MB). - Alternatively, create a temporary file named
info.phpin your root directory containing<?php phpinfo(); ?>, open it in your browser to verify thememory_limit, and delete the file immediately afterward for security reasons.
Part 5: Advanced Optimization Tips to Prevent Future Memory Exhaustion
Simply throwing more RAM at a memory exhaustion error is a temporary band-aid if your WordPress site suffers from underlying performance bloat. Follow these expert optimization strategies to keep your memory consumption lean:
- Audit Your Plugins: Poorly coded plugins that run infinite loops or load massive datasets into memory will crash even a 1024MB memory limit. Deactivate unused plugins and conduct periodic plugin performance audits.
- Optimize Your Database: Bloated databases packed with transient options, post revisions, and spam comments consume massive amounts of PHP memory during database queries. Use plugins like WP-Optimize or Advanced Database Cleaner to clean your tables regularly.
- Upgrade Your PHP Version: Older versions of PHP (like PHP 7.4 or 8.0) consume significantly more memory and process instructions slower than modern PHP versions (PHP 8.2 and 8.3). Upgrading your PHP version instantly yields a 10% to 20% reduction in memory overhead.
- Implement Object Caching: Deploy a persistent object cache using Redis or Memcached. This offloads heavy database query caching away from standard PHP execution, preventing memory spikes during high traffic.
Part 6: Frequently Asked Questions (FAQ)
1. What causes the WordPress memory exhausted error?
This error occurs when a PHP script (such as a plugin, theme, or background task) attempts to consume more RAM than the server’s PHP memory_limit directive permits.
2. What is the recommended PHP memory limit for WordPress?
For a standard WordPress site running modern page builders, WooCommerce, and multiple plugins, 256M is the recommended minimum, while 512M provides optimal headroom for high-traffic or resource-heavy environments.
3. Will increasing the memory limit slow down my server?
No. Setting a higher memory_limit simply gives PHP permission to use more RAM if a script demands it. It does not actively consume extra RAM during normal, lightweight page loads.
4. Why did adding php_value memory_limit crash my site with a 500 error?
This happens when your hosting server runs PHP as CGI or FastCGI rather than an Apache module. FastCGI servers do not support PHP directives inside .htaccess files. Remove the line to restore your site.
5. Can I set the memory limit infinitely high (e.g., 2048M)?
You should never set your memory limit unnecessarily high. Doing so allows a rogue script, infinite loop, or malicious bot attack to exhaust all physical RAM on your server, crashing your entire VPS.
6. Where is the php.ini file located on Linux servers?
The path to php.ini varies based on your operating system and PHP version. You can locate your exact active file by running php -i | grep "Loaded Configuration File" in your SSH terminal.
7. Does WooCommerce require a higher memory limit?
Yes! WooCommerce explicitly recommends a minimum PHP memory limit of 256MB (and ideally 512MB) to handle cart calculations, checkout sessions, and product catalog queries smoothly.
8. What is the difference between WP_MEMORY_LIMIT and PHP’s memory_limit?
memory_limit is the master server setting enforced by PHP, whereas WP_MEMORY_LIMIT is an internal cap defined inside WordPress. WordPress cannot exceed whatever limit PHP has established at the server level.
9. Why does the error keep returning even after I updated php.ini?
If the error returns, you likely forgot to restart your web server or PHP-FPM service (systemctl restart php8.2-fpm), or your hosting provider is overriding your local changes at the master container level.
10. How can I check my current WordPress memory usage in real time?
You can use monitoring plugins like Query Monitor or server-side tools like htop via SSH to inspect real-time RAM consumption across your PHP-FPM worker processes.
Conclusion
Encountering the WordPress memory exhausted error can be stressful, but it is one of the easiest server configuration hurdles to overcome. Whether editing your system-wide php.ini file, modifying wp-config.php, or adjusting cPanel limits, increasing your PHP memory ceiling restores your site instantly and ensures smooth operation for your plugins, themes, and visitors.